

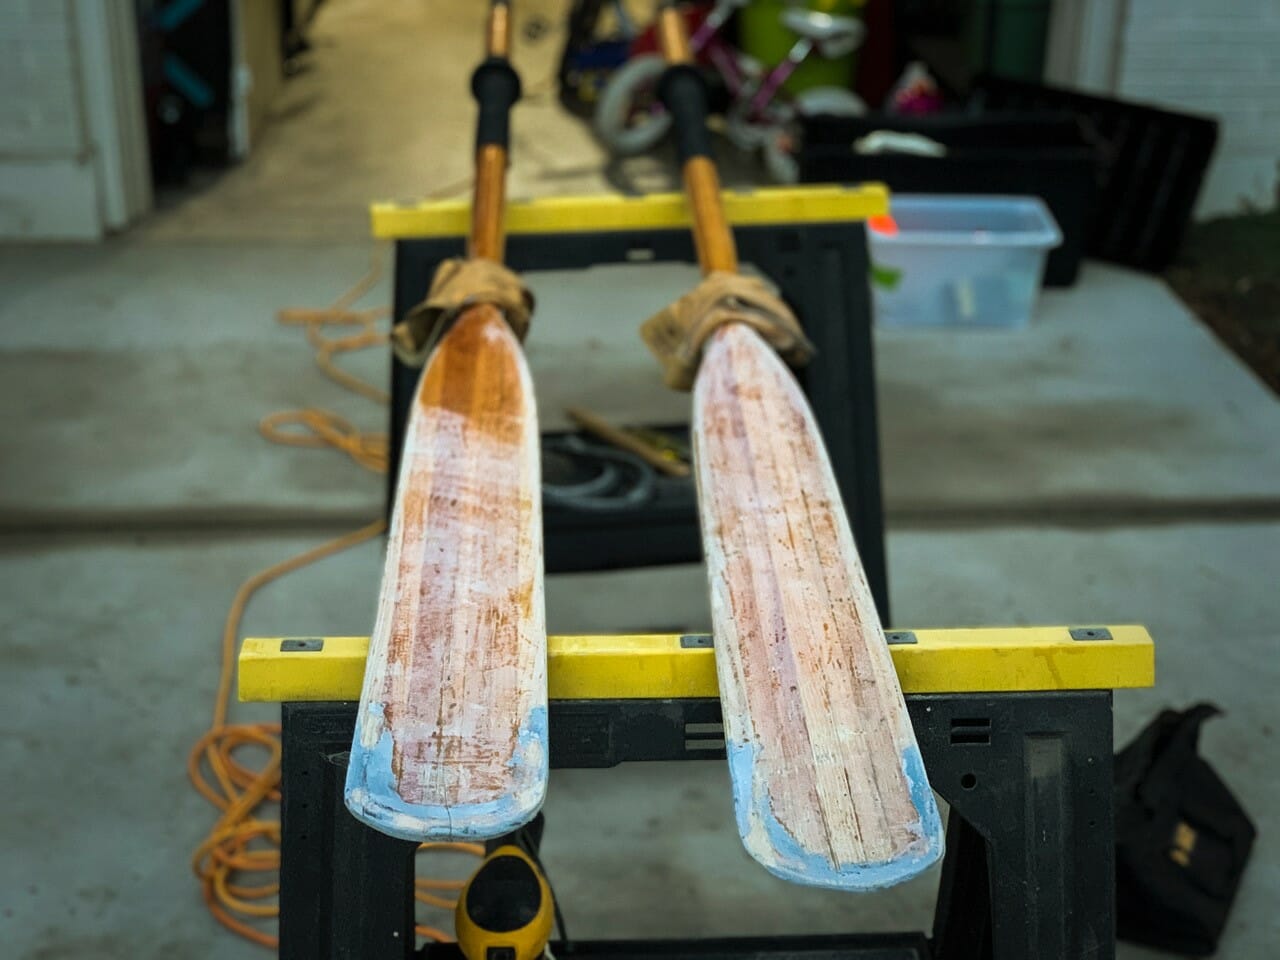
We just got a couple feet of snow, and while my mind is very much thinking of summer, I really do tend to enjoy some mid-winter boat-centric housekeeping at this time of year. Personally, I am a wooden oar guy (more on that choice later), and as such, I occasionally have to do some work not only cosmetically, but just to make them last longer. As most of us know, bare wood and water don’t play so well together over extended periods of time.
If you’re the type of person who loves the way wooden oars row (duh) or loves the way they look, it’s remarkably easy to bring back a beat-up pair to look almost new.
Ask 20 people how to do this and you’ll most likely get 20 answers.
Here’s how I do it.
1. Set up to work outdoors for sanding. During all steps of this process latex gloves and a respirator are recommended. Use blue painter’s tape to wrap around and protect handles, rope wraps or plastic wraps.
2. Get two or three sheets of both 60 and 120 grit sandpaper for each oar. You can use a variable speed orbital sander for the blades. Do not try and use this for the shaft as it will cause flat spots. Simply hand sand the shaft with the sand paper. All you’re doing here is removing the protective coating or varnish from the wood. Sand along with the grain of the wood (as much as you can) until the oar appears dull.
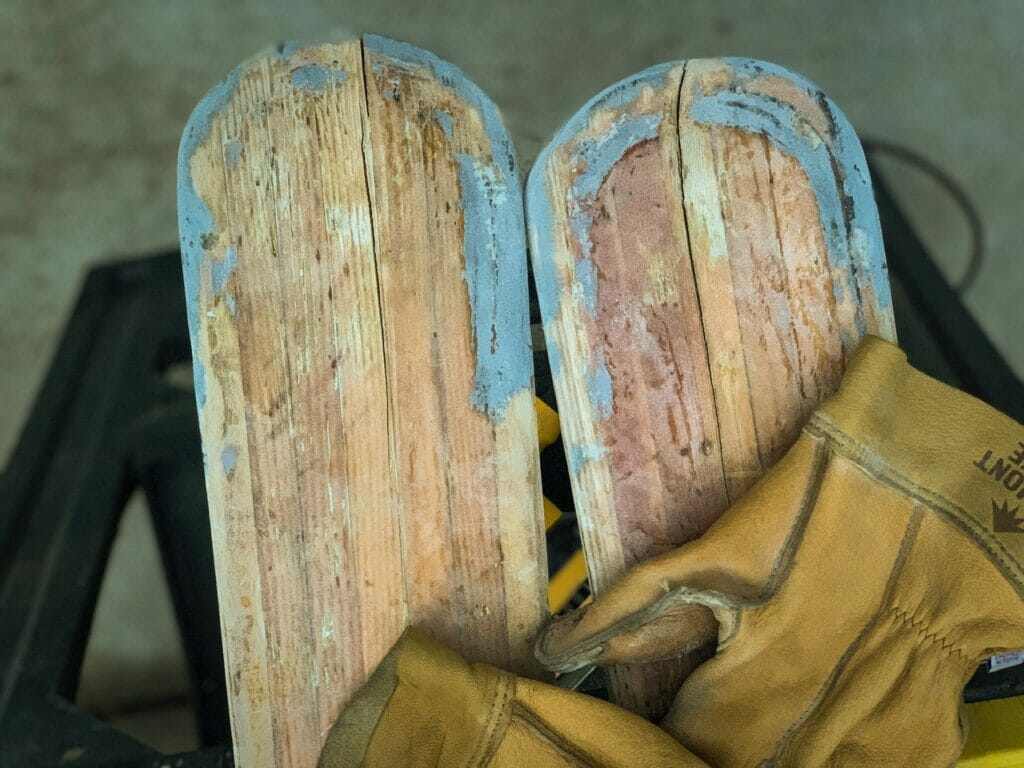
3. *IMPORTANT* If there are bare wood spots with no epoxy or varnish left from either an accident or hard use make sure to lightly coat said areas with a high quality two part epoxy. I recommend two coats. This is definitely another worm hole with tons of opinions and is a multistep process. It is imperative to make sure you do this before varnishing. Google “oar repair” or “epoxy fix” for oars. Once this part is complete and everything is uniformly sanded move on to step 4.
4. Blow sawdust off with canned air or compressor and clean with denatured alcohol.
5. Cover the rope wraps, handles or portions of the wooden oar you do not want stained with painter’s tape if needed.
6. For the remainder of the process an indoor space that’s as clean as possible is needed. If the room is dusty or dirty, the varnish will show lots of dust particles once dry. Again, another worm hole… Google prepping a room for Varnish. There are tons of tips and trick to help.
7. Lay down plastic drop-cloths and support the oars at the VERY ends so as to have access to as much wood as possible between coats. Conversely if you can hang the oars vertically that is even better, but it can be challenging.
8. Buy something called a Tack cloth, and use it to wipe down the oars RIGHT before you apply varnish. It removes fine particles of dust.
10. PUT ON RESPIRATOR 😉
11. Make sure to dip the brush (many opinions here) with brushing liquid (a thinner) before using with varnish. This helps spread the varnish out and makes it easier to clean the brush after you’re done.
12. Apply varnish with brush strokes in one direction, taking note to remove any brush hairs and making sure that no drips are sagging on the underside of oars. Less is more here…. Don’t try to make it perfect. Varnish is self-leveling, and over-brushing will make it look bad. Wait 24 hours before adding a second layer. Before doing so take 220 grit sand paper and give a very light once-over. Blow off and clean again with denatured alcohol and tack cloth. Repeat until you’re satisfied with how the oar looks.
13. Wait 24 hours from your last coat and go fish!